Bakeover: Chocolate Chip Ripple Cookies

"OHH, you didn't have to, really you didn't have to; I'm used to just bringing my own meal." 

I was tired of hearing this from my friends with food allergies or preferences say this every week when they'd come over for dinner. They'd sit with their sad takeout from the grocery store while we'd feast on homemade meals and tasty desserts every Tuesday for our community group gatherings.

And I was tired of feeling bad about it. What kind of hostess would I be if I expected my friend, who I invited to dinner at my house, to sit this one out because I decided I wanted to serve a glutenous treat?

Before, as one of my favorite YouTubers calls it, The Great Unpleasantness, I would cook and bake for various social occasions each week. A community group gathering on Tuesday with friends who are gluten-free and avoid dairy, and a girl’s night on Wednesdays that needs baked goods without eggs and milk. To be honest, I started to get bored with the few allergy-friendly cookbooks in my possession. I wanted to bake the brownies from the most recent Ina Garten episode I just watched, or Gesina Prado's focaccia bread that would be perfect alongside the soup I was planning for my Tuesday night gathering.

That's when the idea for BAKEOVERS was born. Slowly but surely, I started taking 'traditional' recipes and swapping in egg replacements or gluten-free flour. I didn't tell anyone at first because I wanted to see if they could tell the difference. To my friends with food allergies, I’d just say “This is {insert their name here} friendly”, to which they’d smile and dig right in.

Bakeovers are my version of a recipe makeover, given the Everybody Baking Co. treatment. I'll share and link you up with the original recipe that inspired my variations, and then share the gluten-free, dairy-free, and vegan versions here. I thought these cookies would be the perfect place to start - pan banging chocolate chip cookies.

Intriguing title? Check.

Drool-worthy golden crispy brown allure? Check.

I've read about these cookies for a while now, and even Ina Garten has her version in her newest cookbook. Sarah Keiffer is a Minneapolis-based home baker and 2x cookbook author. Her Vanilla Bean Blog is the home of our Bakeover Candidate today.

Some things to know

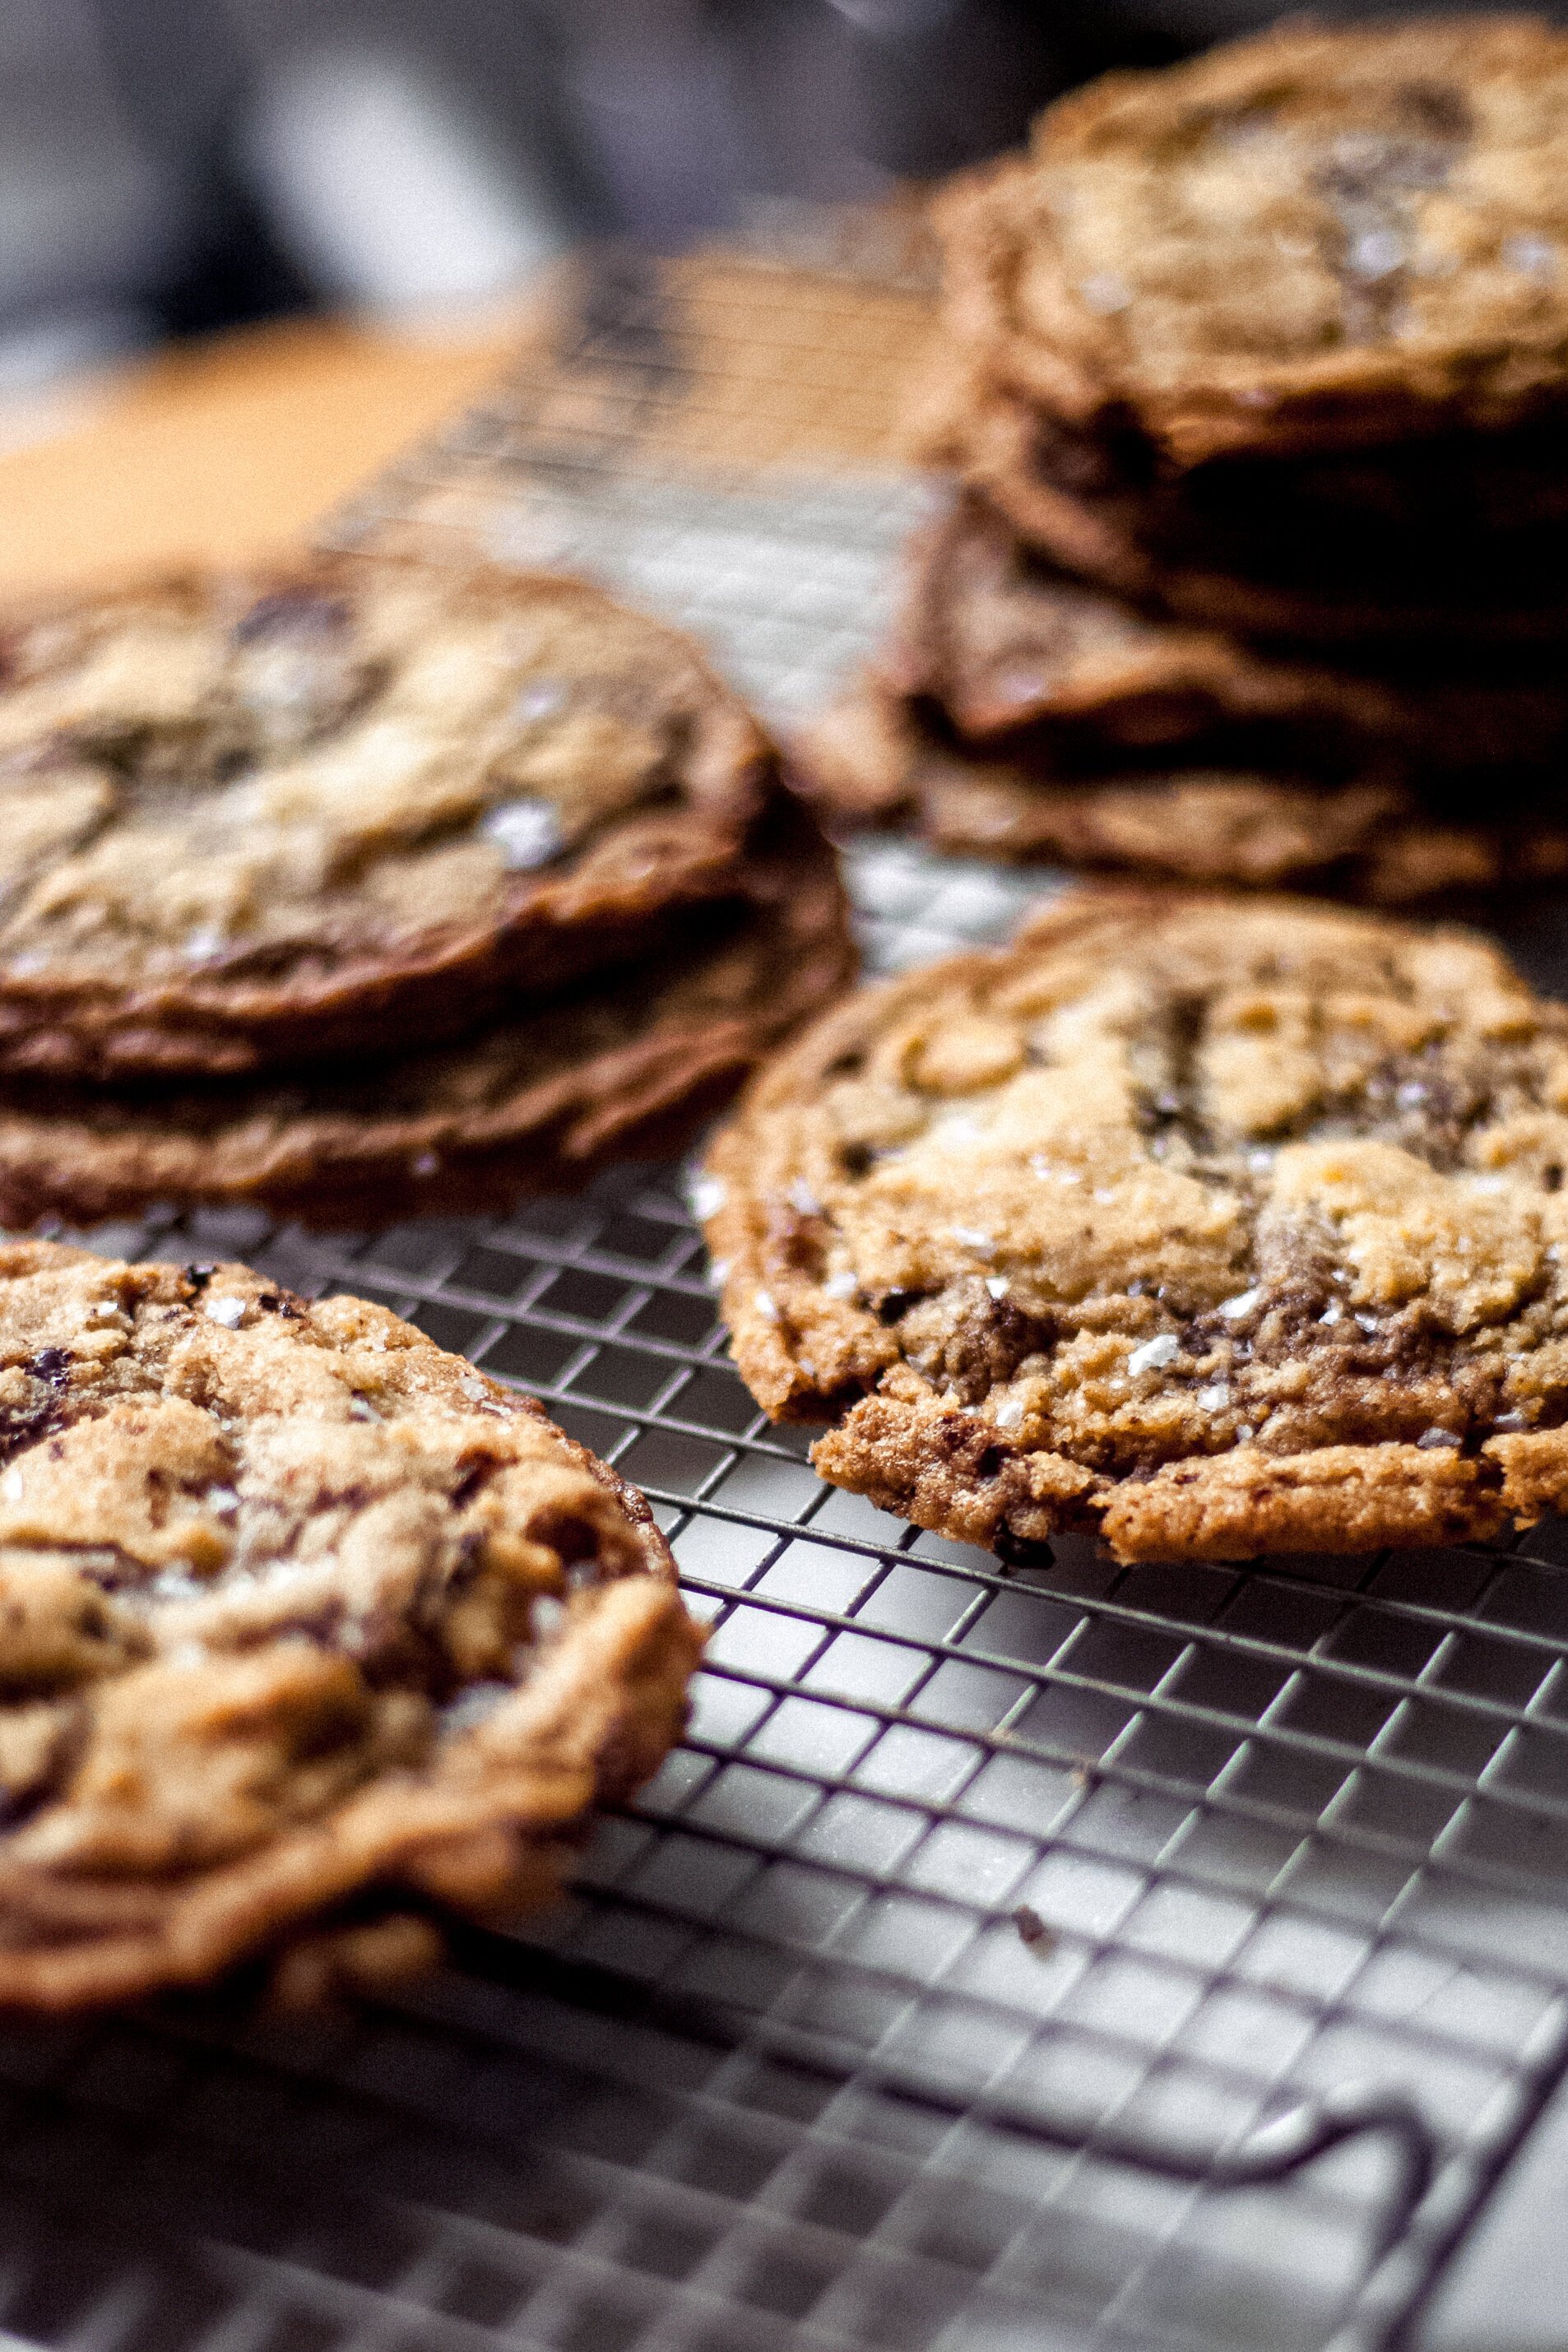
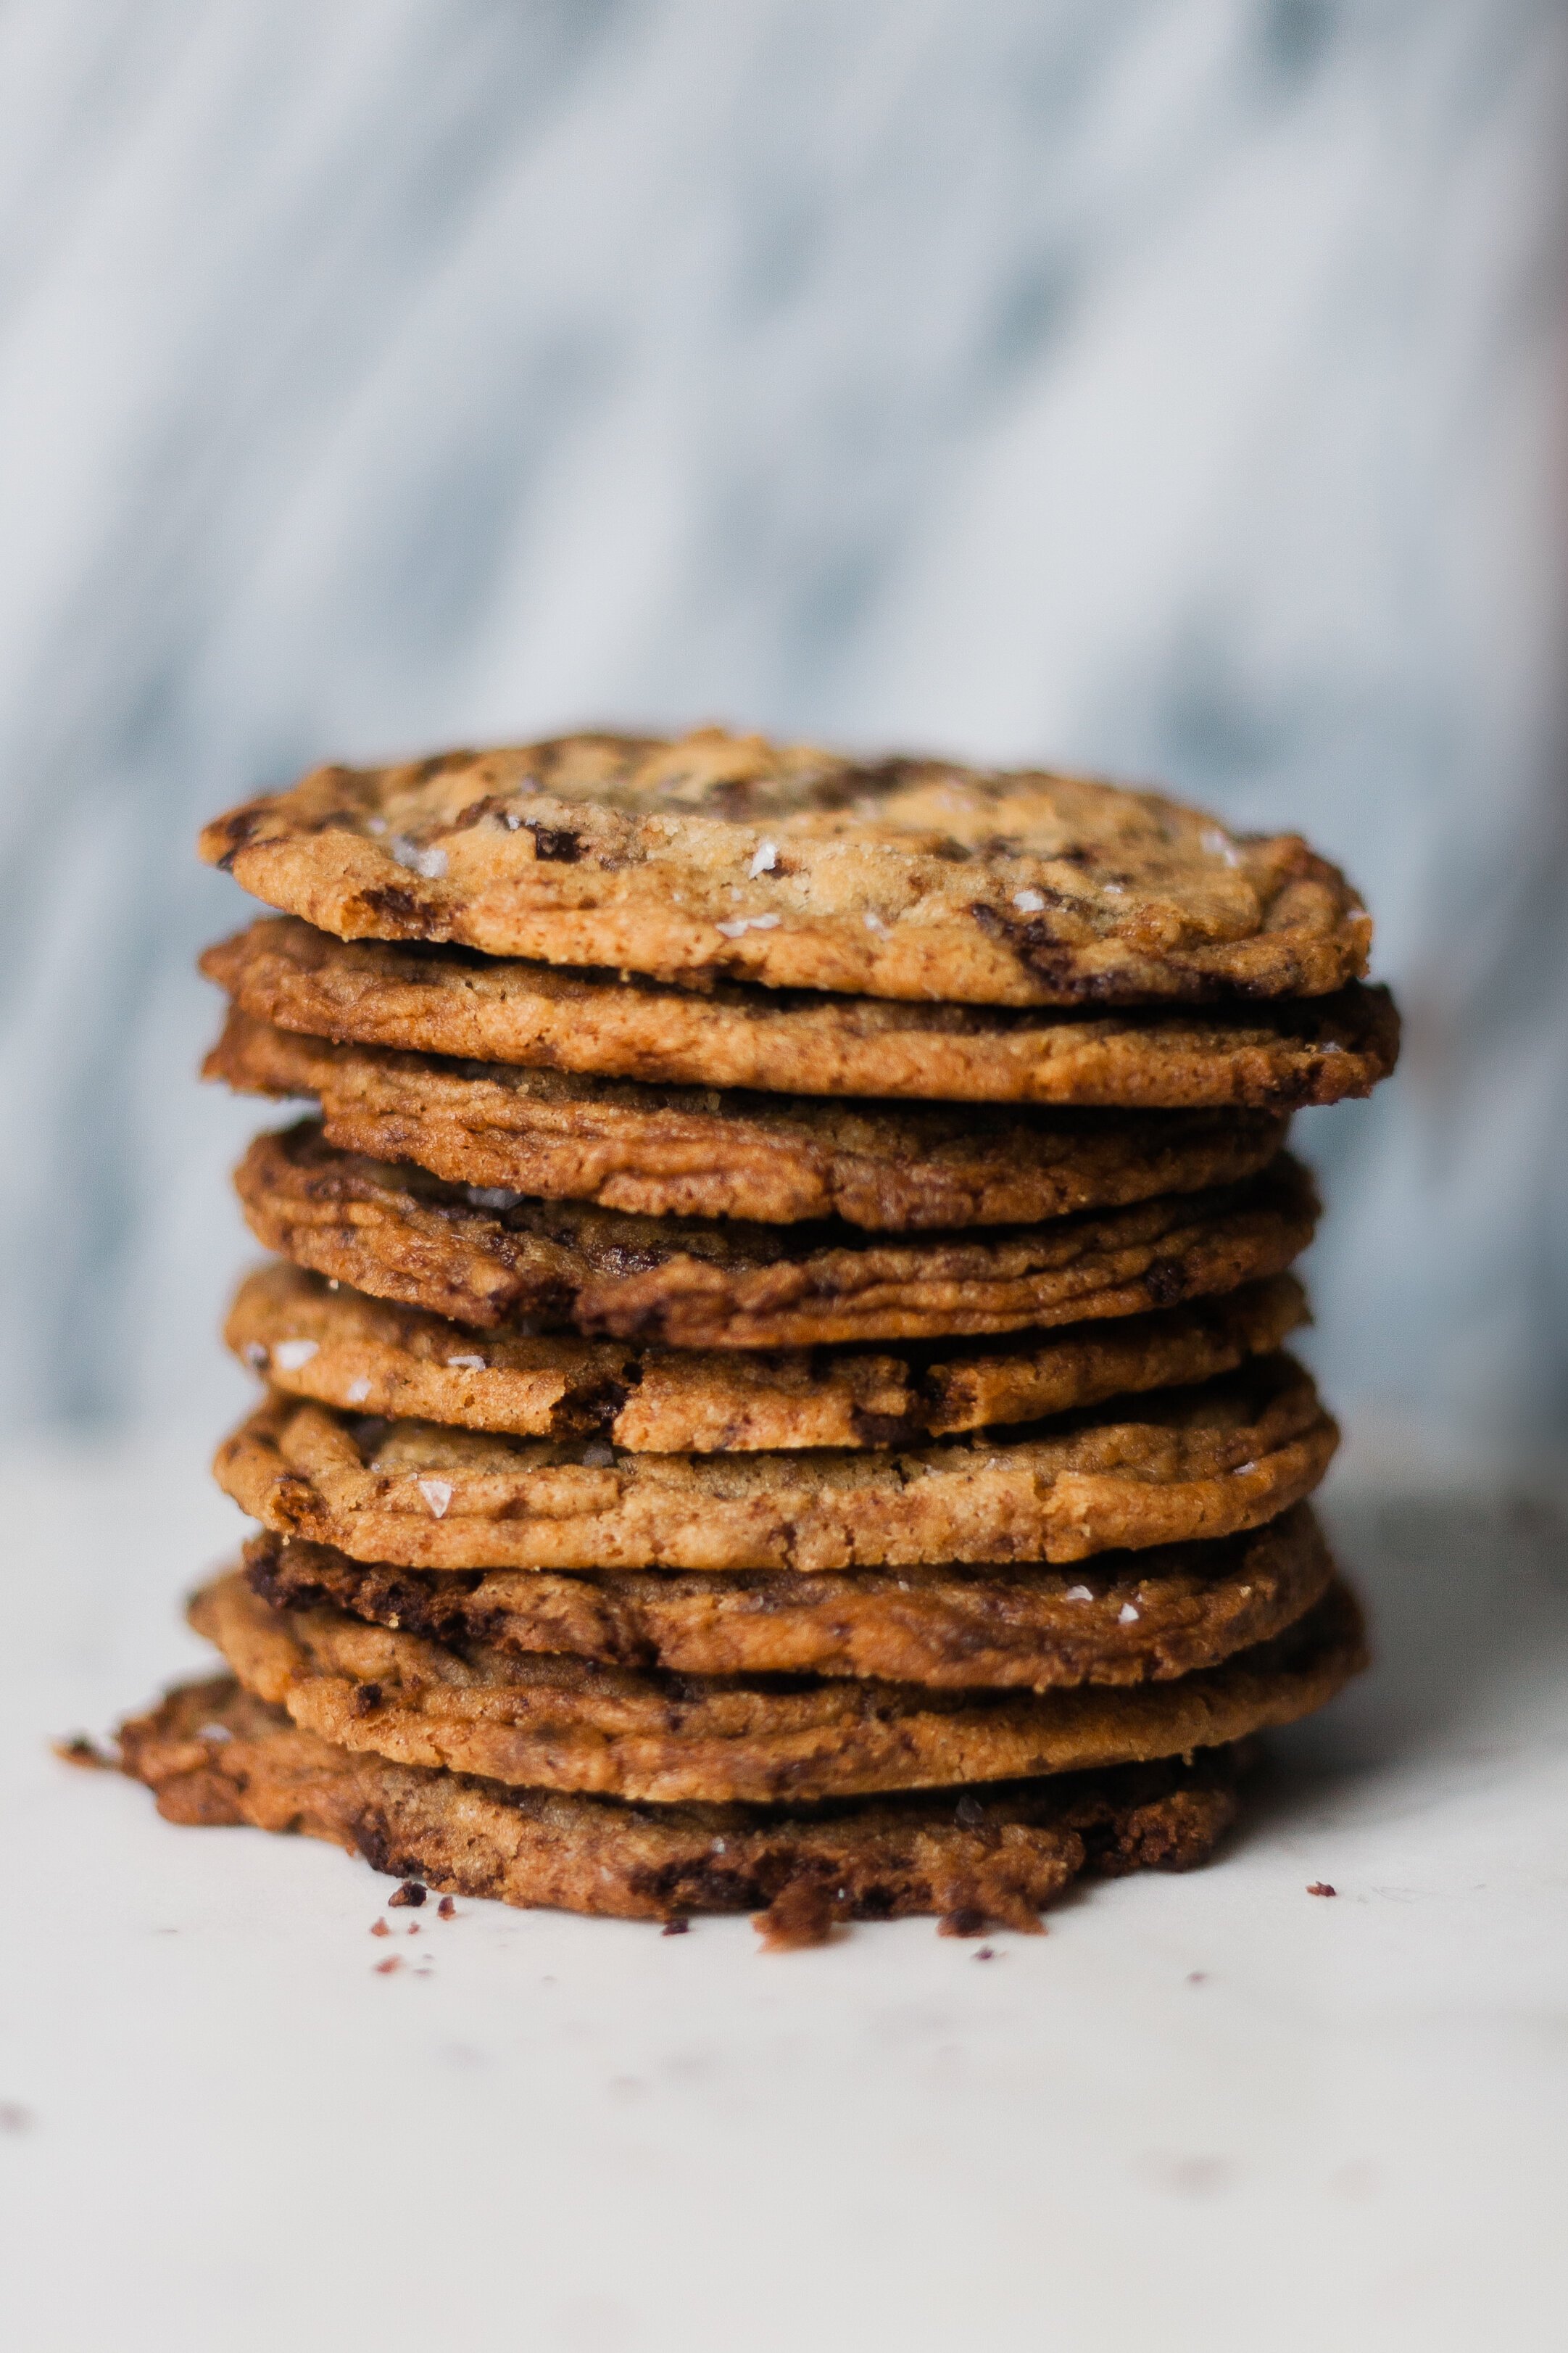
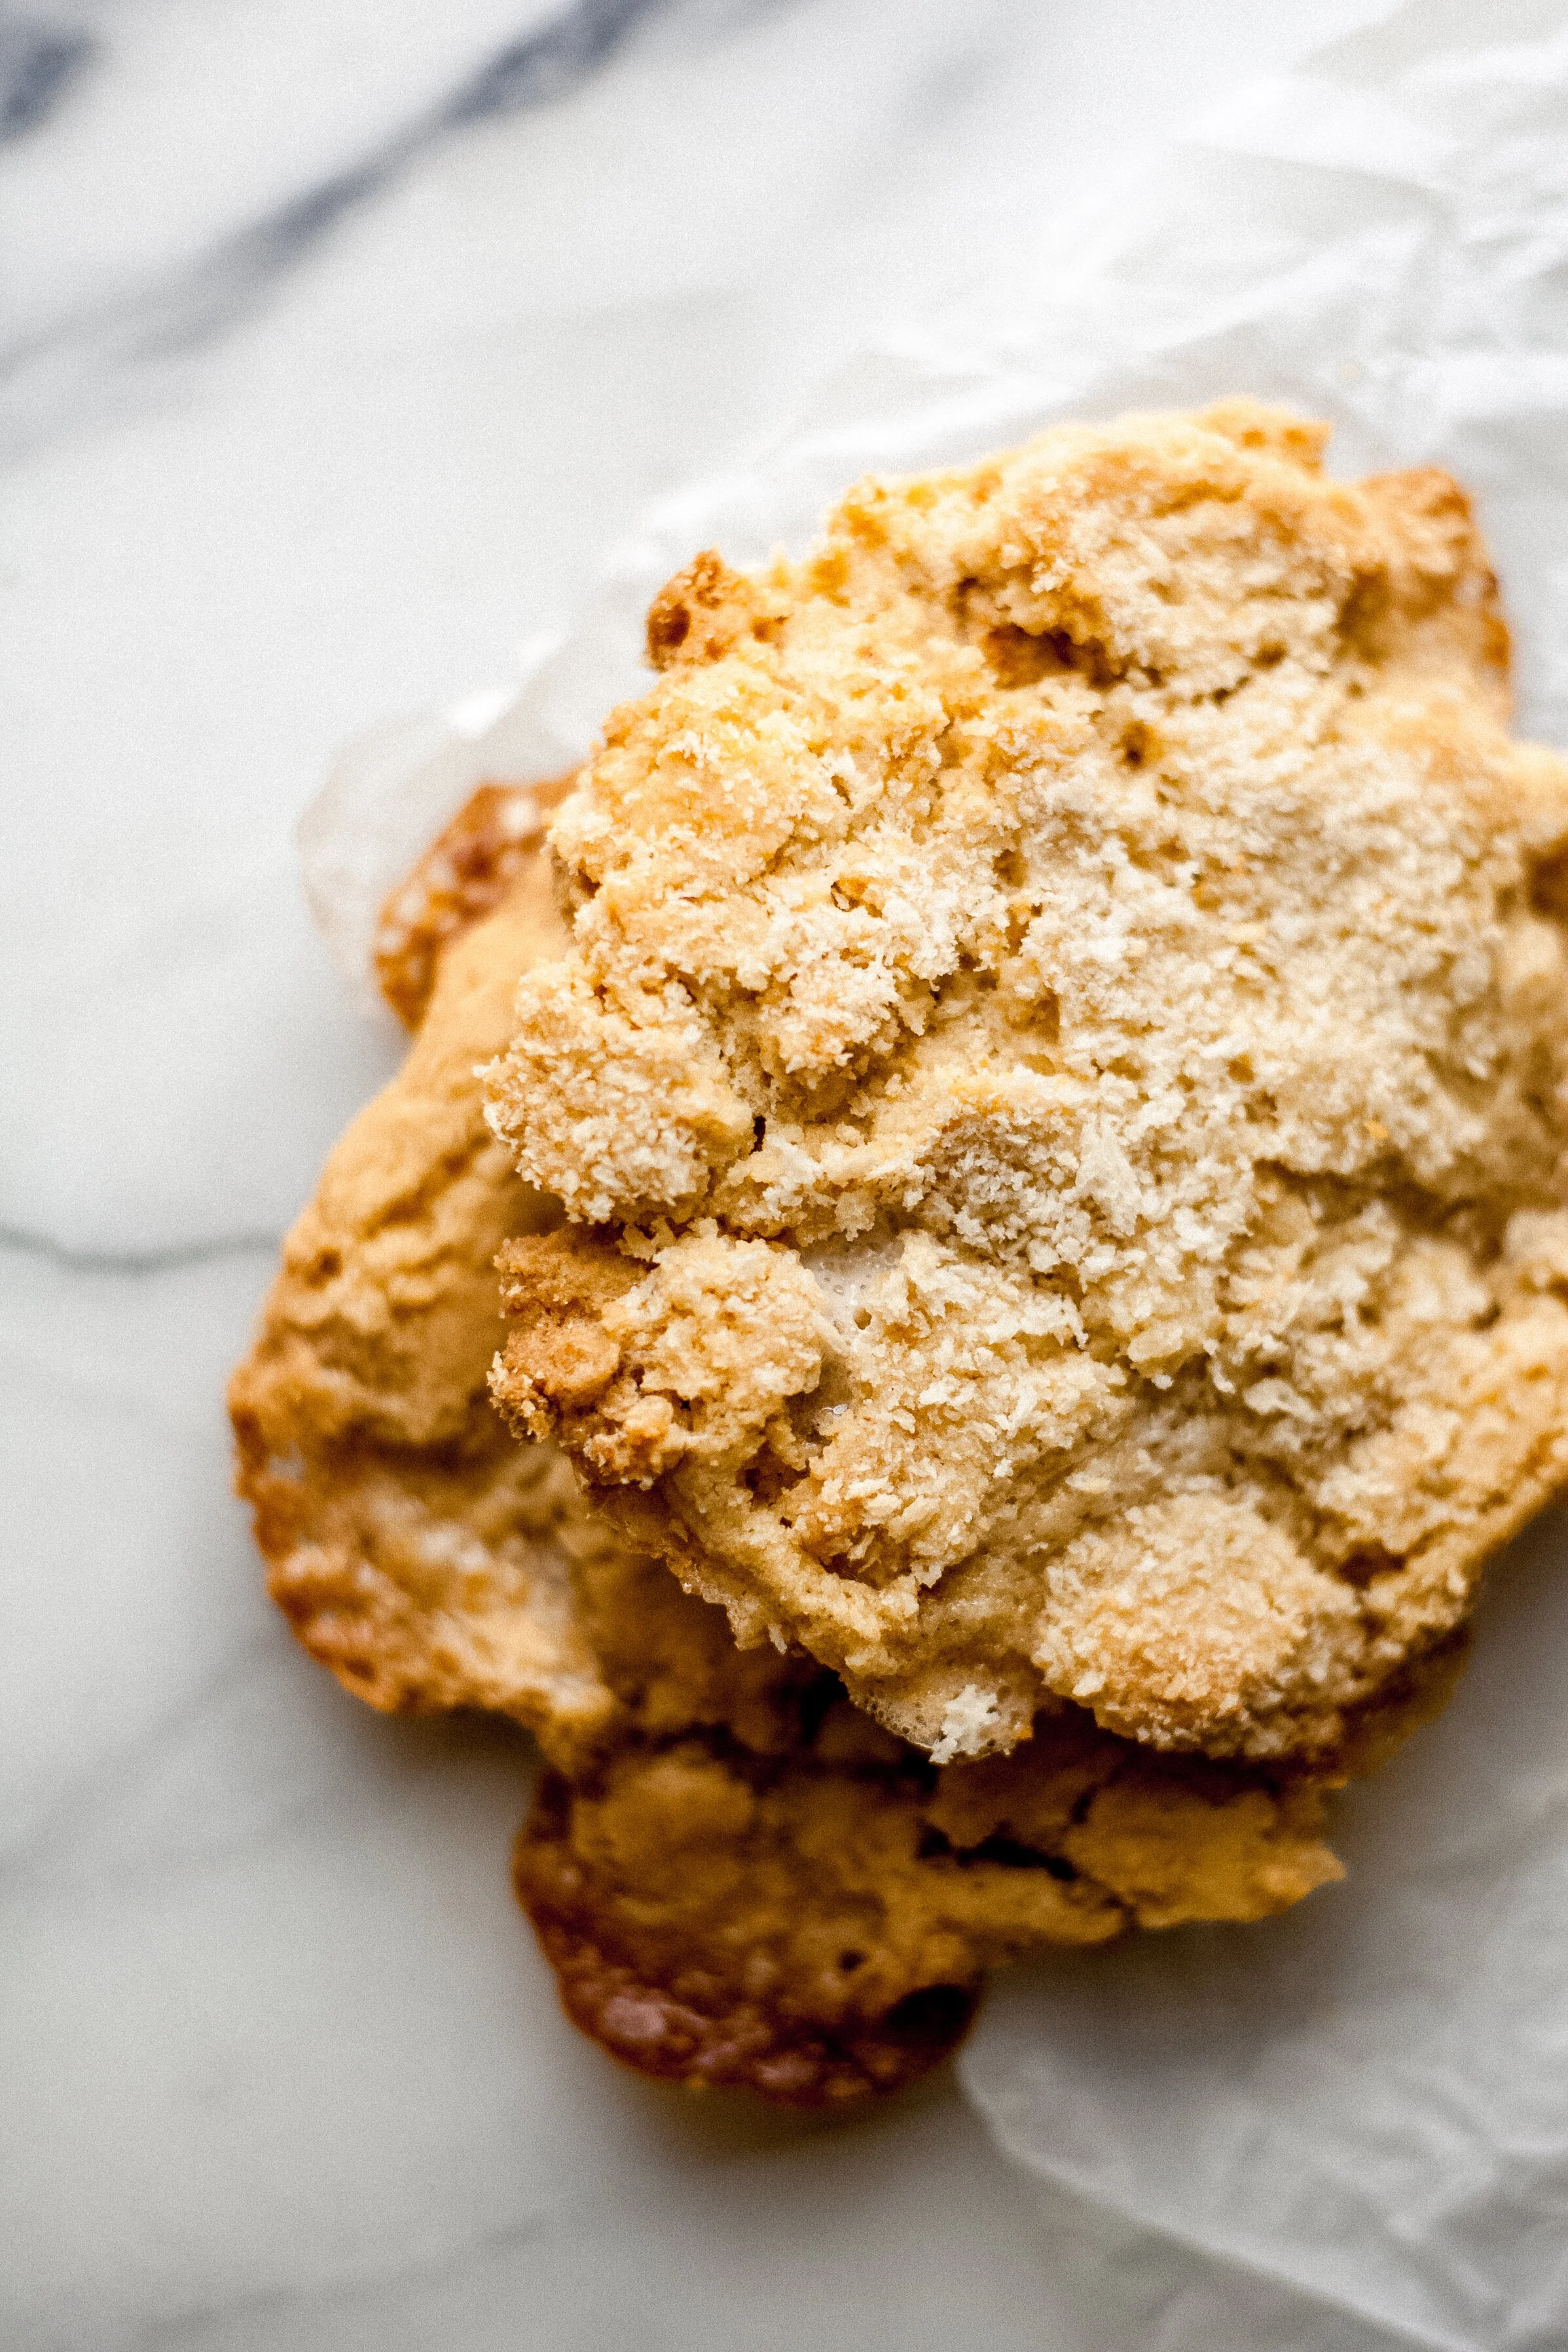
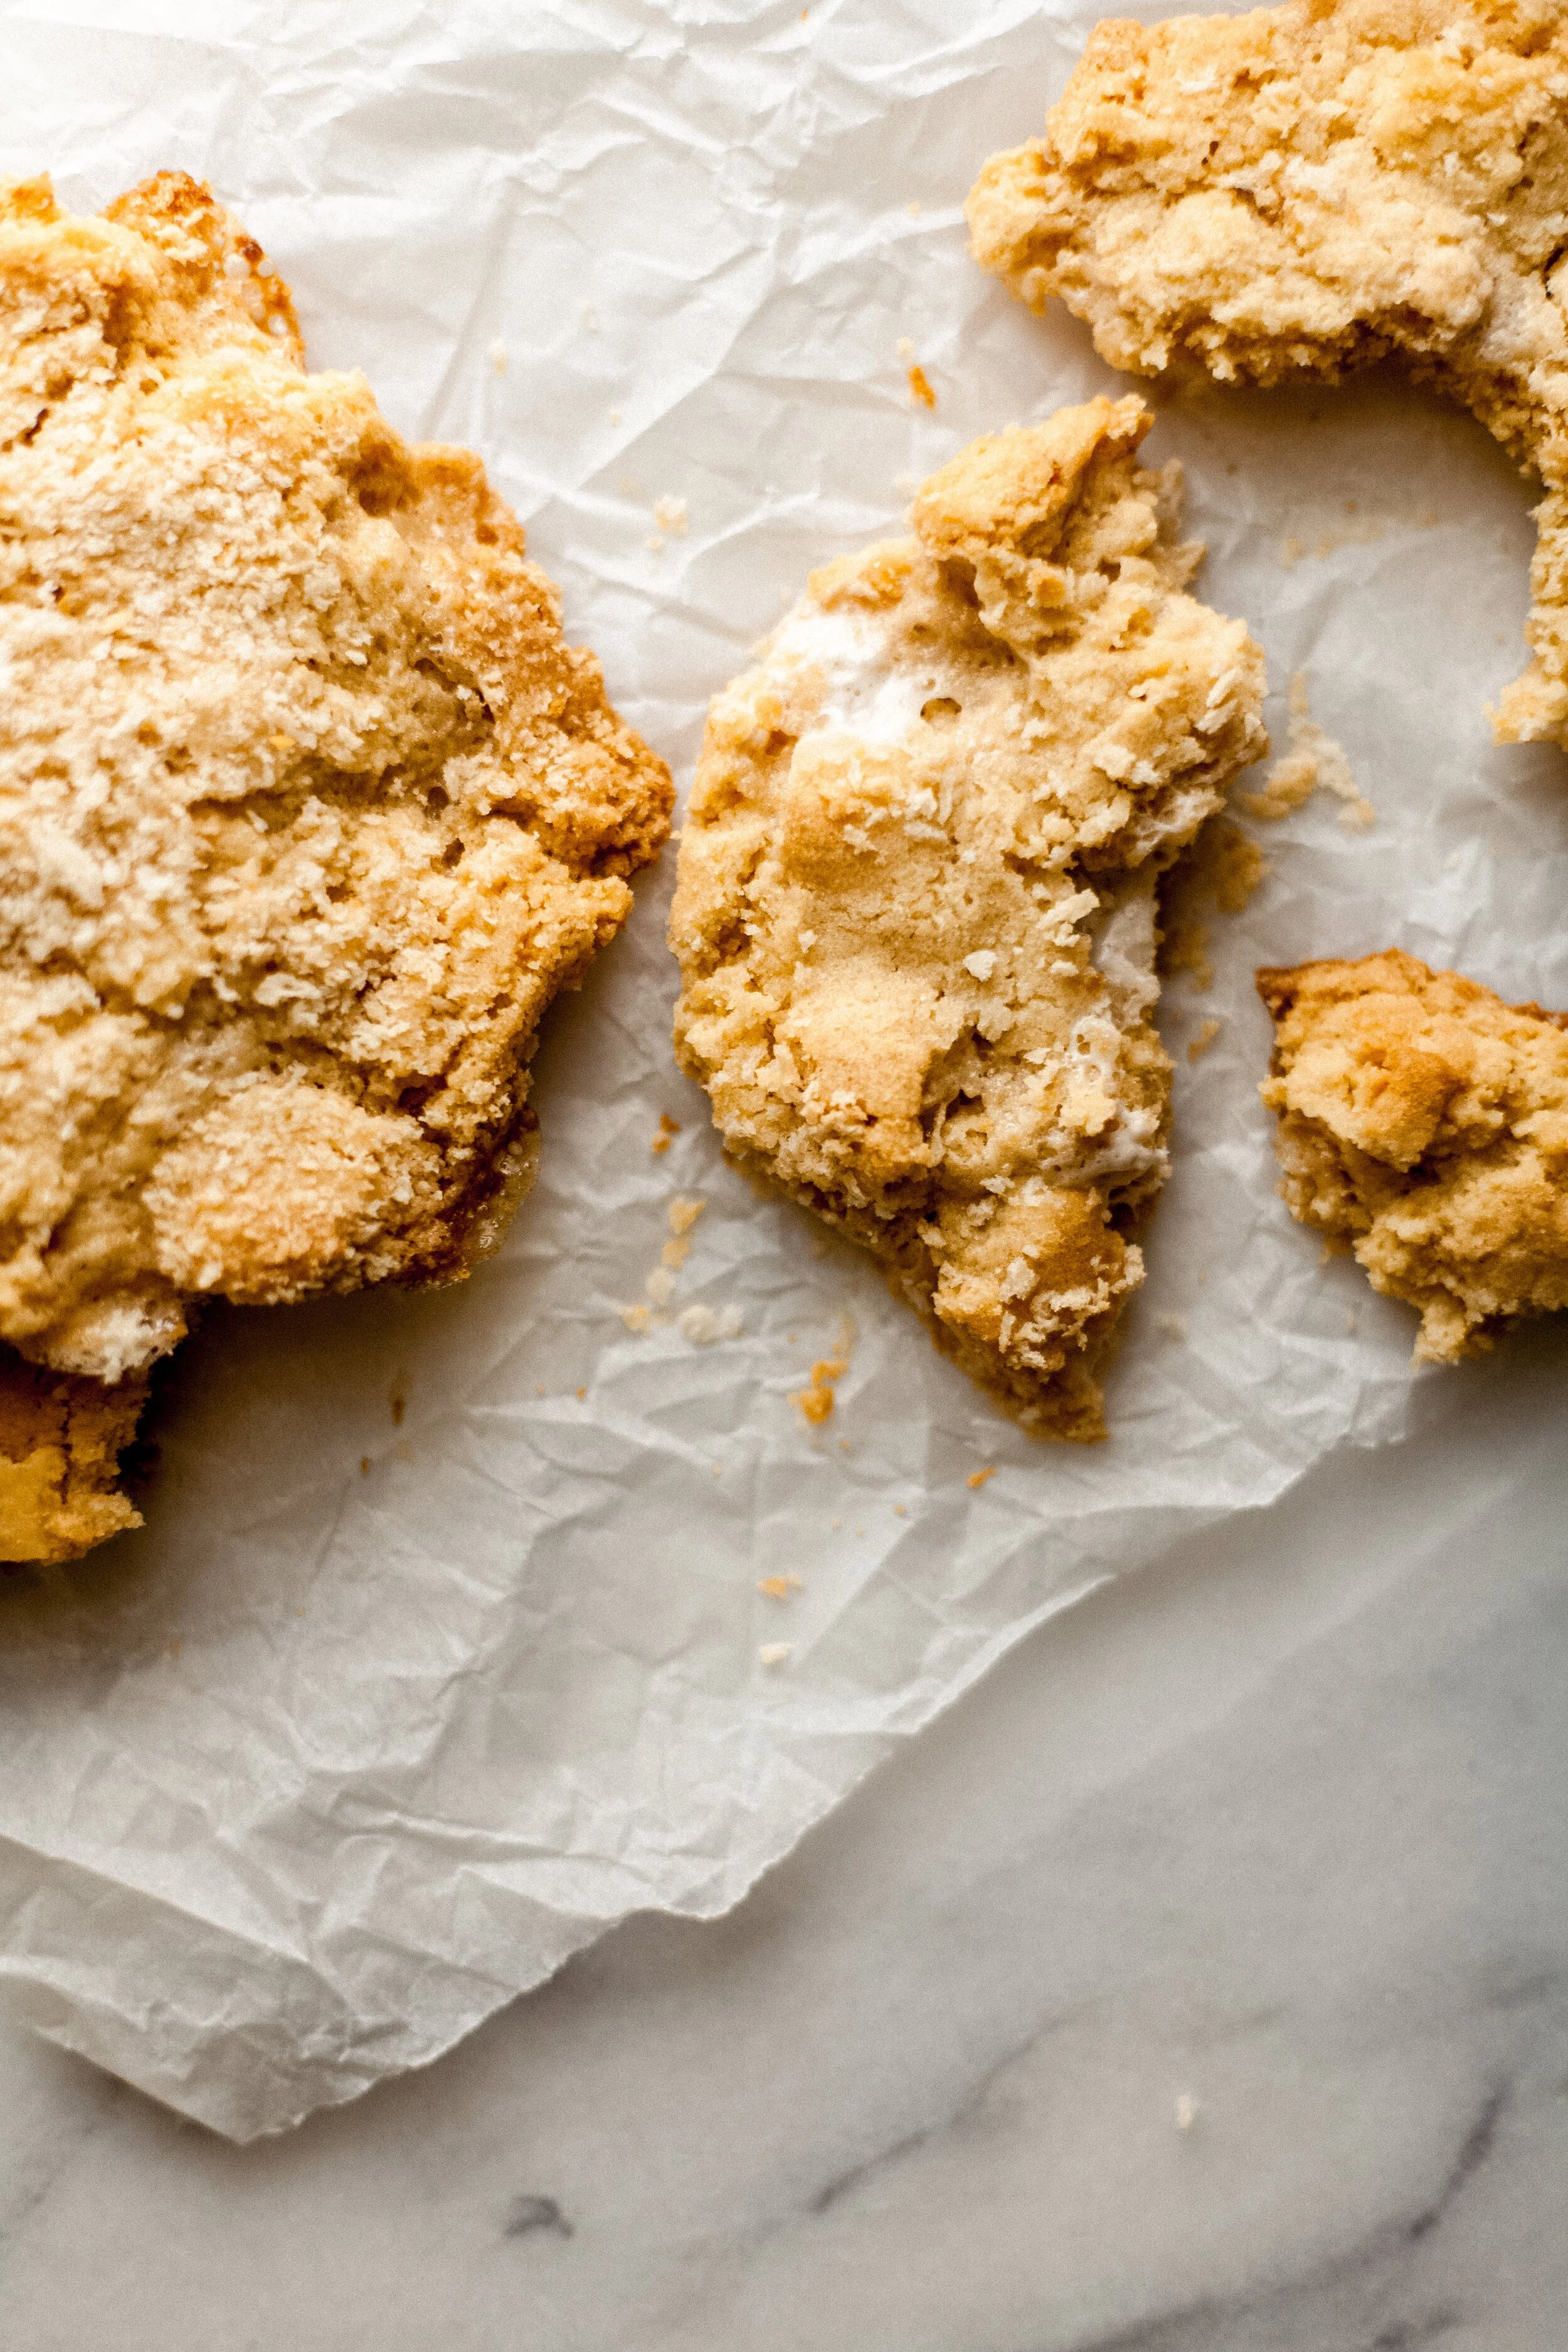
  1. Sugar is the star. These cookies are deliciously golden in color and crispy on the edges with gooey just cooked centers. The crisp forms as they cool thanks to the high amount of sugar, mainly white sugar. As the sugar bakes, it carmelizes, making the cookies browner and crisper by absorbing moisture in the dough. As the white sugar melts, this is also why the cookies spread. This also is key to the pan banging that will ensue: dropping the pan will push the melted dough outward from the center, resulting in ripply goodness with each bang of the sheet pan.

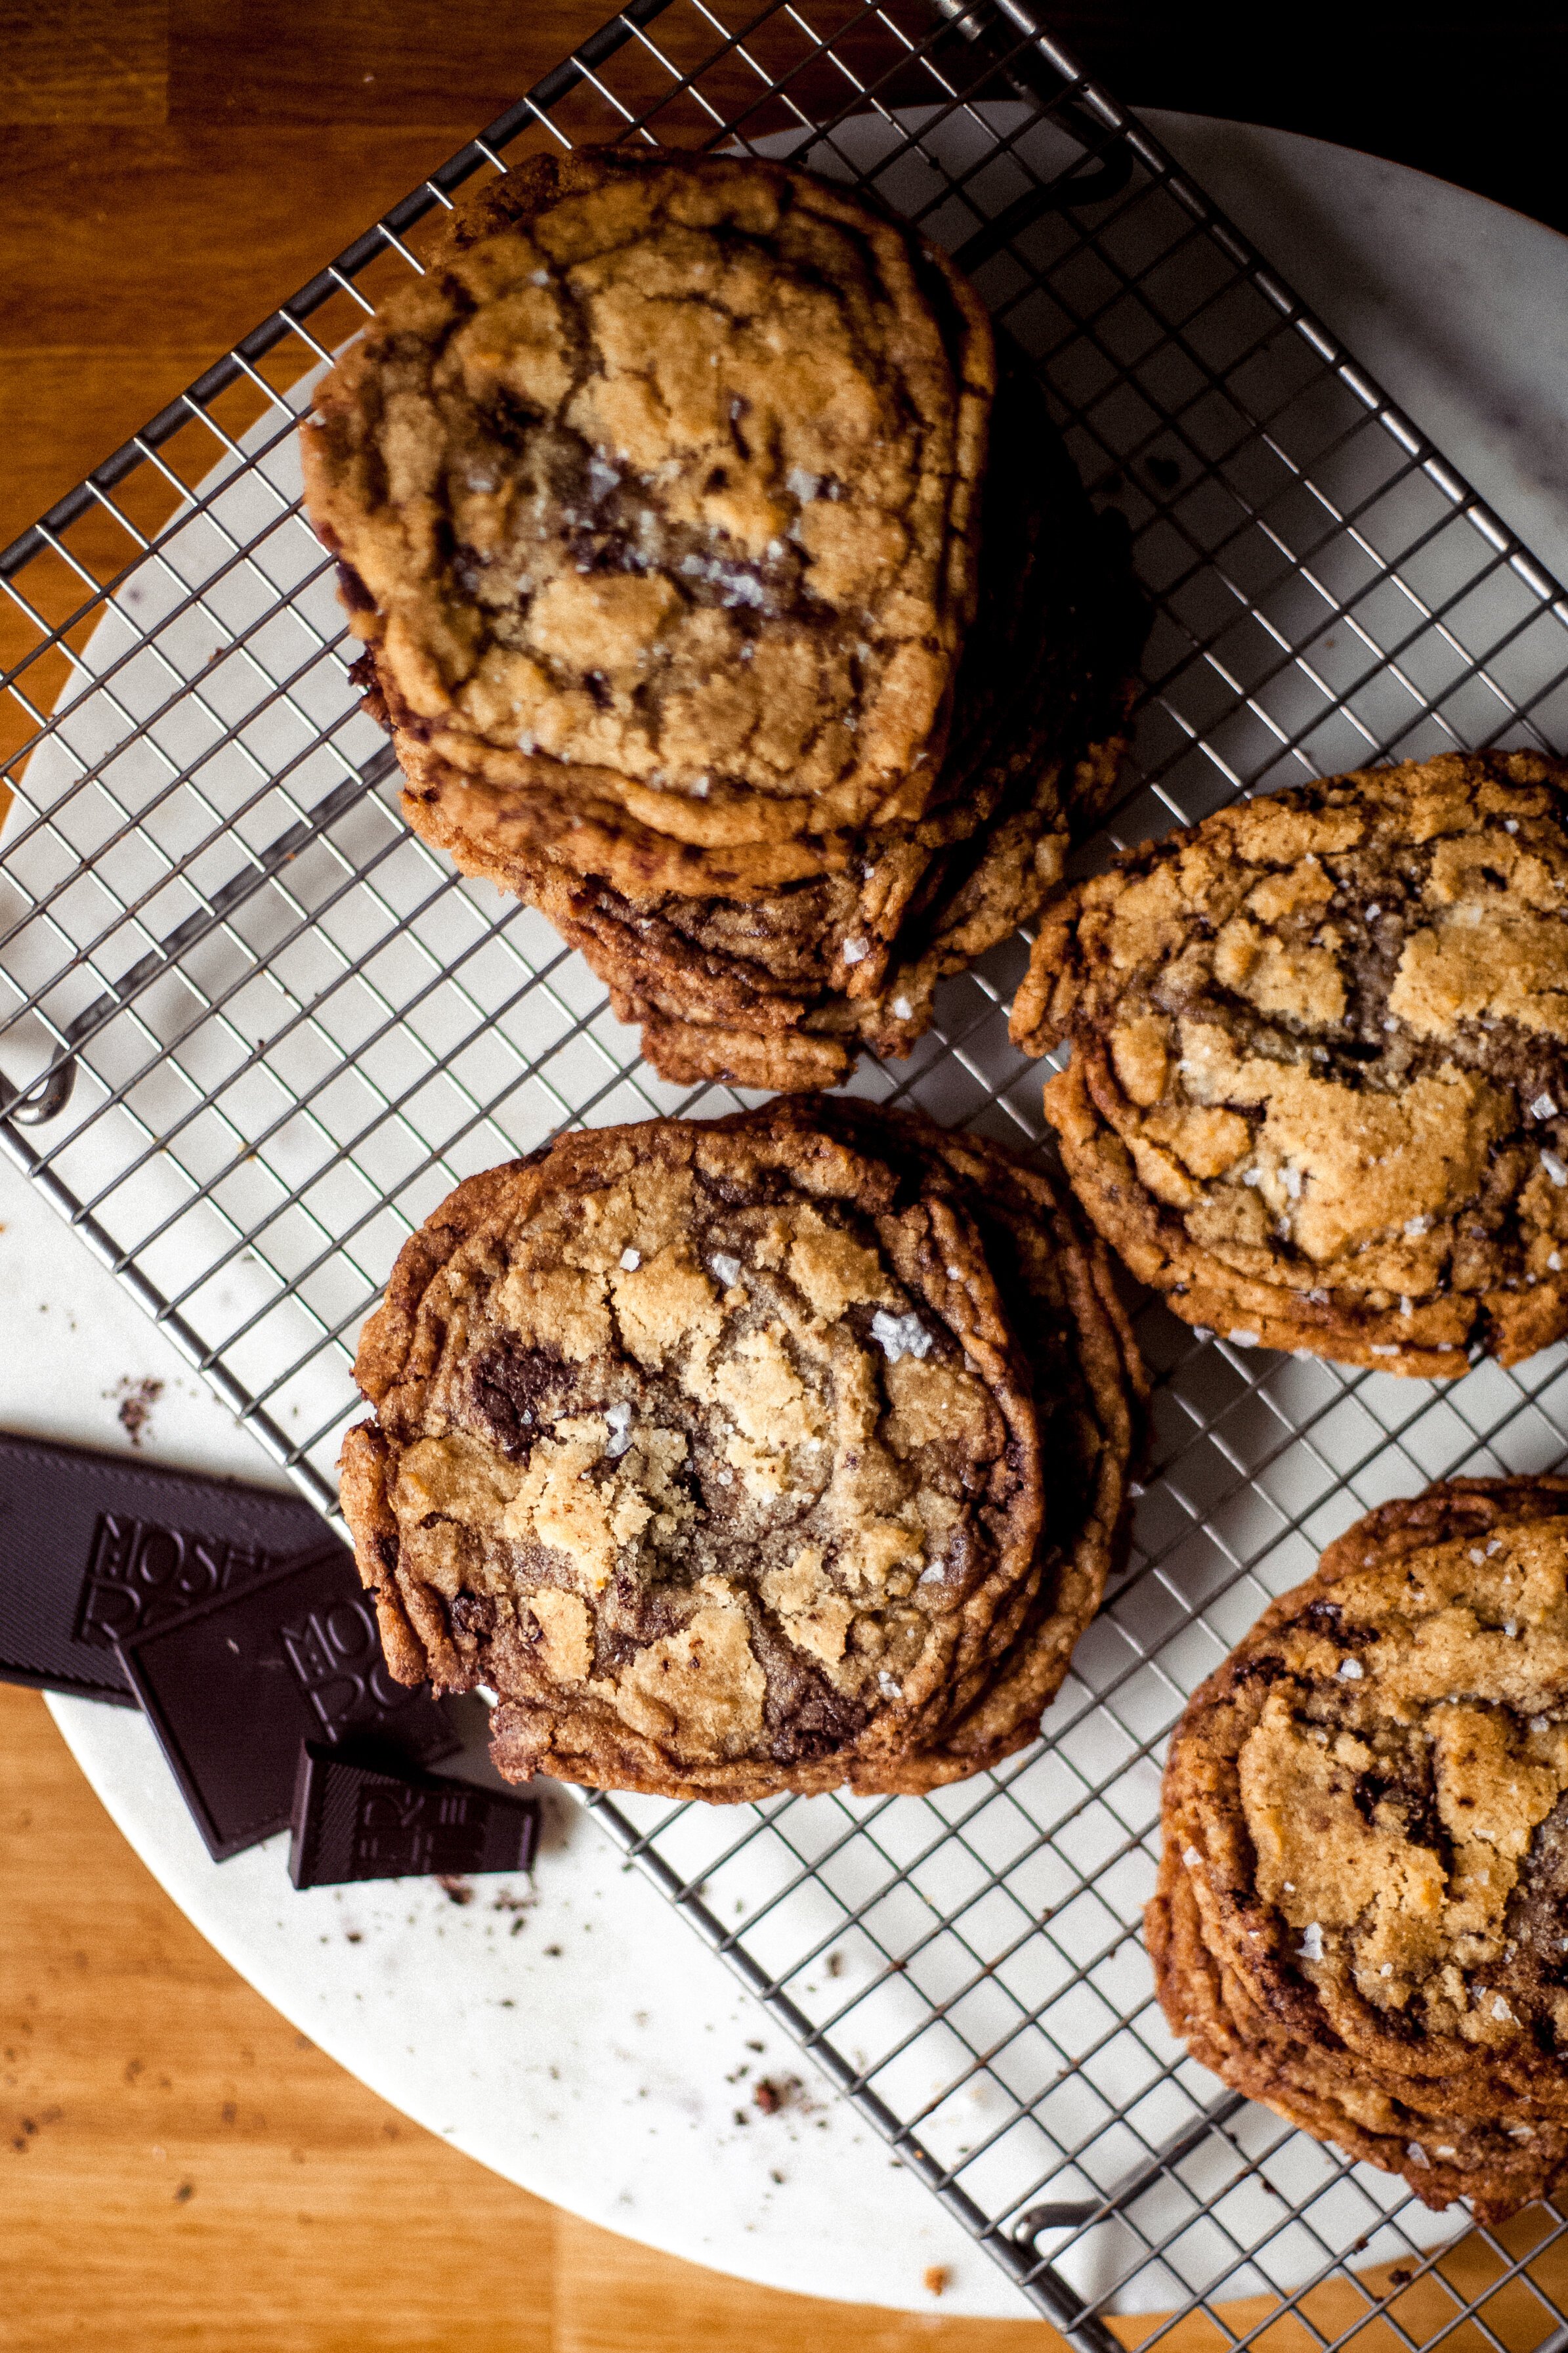
  2. Use high-quality bar chocolate. Pools of delicious bittersweet chocolate top the cookie by chopping a bar of chocolate instead of using chips. Sarah has a great section of baking notes on the recipe posting, and she explains chocolate chips do not spread as well as chopped chocolate. Also important to note that using bittersweet or semisweet chocolate ensures the cookies remain dairy-free. This is because these types of chocolate contain cocoa butter, which despite the name, is a butter derived from the cocoa bean and has nothing to do with dairy. I found this great resource on brands and types of chocolate that are dairy-free and outlines which brands are gluten, nut, or soy-free.

  3. Freezing the dough.After you scoop out the dough, you’ll place it in the freezer for 15 minutes. This ensures that the centers have a chance to stay gooey instead of completely baking flat in the pan.

  4. Notes on a successful egg, dairy, or gluten-free variation.Dairy: the main dairy concern here is butter (see note about chocolate above). This is super easy when we use any vegan butter of choice. I really have grown to like Miyoko's European style butter, but my old standby has always been Earth Balance Vegan Unsalted Butter. In the pictures below, I used Earth Balance.

  5. Eggs: an egg’s role in cookie dough is to give lift and moisture to bring dry ingredients together. This recipe only calls for one egg. I use my favorite egg replacement: 1.5 tbsp water + 1.5 tbsp oil (I like coconut oil but have used vegetable…whatever you have!) + 1 tsp baking powder combined together and added as you would an egg. You’ll notice when you add the baking powder there is some fun fizzing going on - giving us, ta-da! - air bubbles which will give us lift!

  6. Flour: I think this is the biggest gamble in swapping in and out sometimes. Flour’s role in baking is to bind ingredients together with the strength of gluten strands created during the mixing process. This recipe doesn’t call for a lot of flour, to begin with, because we want the dough to have the freedom to spread out, not stick together in a ball. With gluten-free flours, we typically need to add additional components to ensure strength is achieved to hold everything together. The great part here is we don’t need much lifting power from the flour because these cookies are naturally flat. I have learned a lot from this series of infographics to understand what ratios of ingredients are needed to ensure the result you need from a gluten-free blend. This is why I typically prefer to blend my own flour for gluten-free baking; it gives you a finer edge of control.

  7. The cookies I photographed for this recipe are gluten-free, dairy-free, and egg-free. BELIEVE YOUR EYES, FRIENDS. When I am testing a recipe, I start with the most complex version to see what happens. Using gluten-free flour does produce a slightly flatter cookie than those with all-purpose flour, but we get that same crunchy cookie we’re going for. Remember, gluten-free baked goods sometimes don’t brown as well, need longer to cook, and absolutely need longer to cool. So, patience is required if you’re attempting gluten-free!

And with that, here is our maiden voyage of the Bakeover series! What questions do you have?

Use the comments, and I’ll get you an answer in a jiffy! Your questions will make these recipes better going forward, I promise!


EBCo. Chocolate Chip Ripple Cookies

Inspired by Sarah Kieffer’s Vanilla Bean Blog: Pan Banging Chocolate Chip Cookies

jump to your ingredients of choice:

TRADITIONAL | GLUTEN-FREE | VEGAN | GLUTEN & DAIRY FREE


💯gluten & dairy free

GF Flour Blend:

  • 84g White Rice Flour

  • 84g Brown Rice Flour

  • 42g Potato Starch

  • 42g Tapioca Starch

  • 14g Potato Flour

  • 8g Xanthan Gum

  • 8g Pectin

12g baking soda (1 tsp)

5g kosher salt (1 tsp)

225g unsalted vegan butter, at room temperature (2 sticks) 

300g granulated sugar

50g light brown sugar

Equivalent of 1 egg:

  • mix 1.5 tbsp water + 1.5 tbsp oil + 1 tsp baking powderer

2 tablespoons water

170g bittersweet chocolate (I prefer Guittard, chopping into bite-sized pieces ranging +/- ½ inch (6 oz)

🥐traditional

284g All Purpose Flour (2 cups)

½ teaspoon baking soda

¾ teaspoon salt

227 g unsalted butter, room temperature (½ pound or 2 sticks)

300 g granulated sugar (1½ cups)

50 g packed brown sugar (¼ cup)

1 large egg

1½ teaspoons Pure Vanilla Extract

2 tablespoons water

170g bittersweet chocolate (I prefer Guittard, chopping into bite-sized pieces ranging +/- ½ inch (6 oz)

🌈gluten free

GF Flour Blend:

  • 84g White Rice Flour

  • 84g Brown Rice Flour

  • 42g Potato Starch

  • 42g Tapioca Starch

  • 14g Potato Flour

  • 8g Xanthan Gum

  • 8g Pectin

12g baking soda (1 tsp)

5g kosher salt (1 tsp)

225g unsalted butter, at room temperature (2 sticks) 

300g granulated sugar

50g light brown sugar

1 egg

2 tablespoons water

170g bittersweet chocolate (I prefer Guittard, chopping into bite-sized pieces ranging +/- ½ inch (6 oz)

✨vegan

284g All Purpose Flour (2 cups)

½ teaspoon baking soda

¾ teaspoon salt

227 g unsalted vegan butter, room temperature (½ pound or 2 sticks)

300 g granulated sugar (1½ cups)

50 g packed brown sugar (¼ cup)

Equivalent of 1 egg:

  • mix 1.5 tbsp water + 1.5 tbsp oil + 1 tsp baking powder

1½ teaspoons Pure Vanilla Extract

2 tablespoons water

170g bittersweet chocolate (I prefer Guittard, chopping into bite-sized pieces ranging +/- ½ inch (6 oz)


Materials

Stand mixer

Kitchen scale

Small and medium bowls

Cutting Board

Knife

Spatula

2 3/4 oz cookie scoop or 1/3 cup measure

Foil

Sheet pan


Instructions

  1. Preheat the oven to 350F, and place the rack in the middle of the oven.

  2. Line your baking sheet with aluminum foil, making sure to keep the dull side facing up.

  3. In a small bowl, weigh your dry ingredients of flour(s), baking soda, and salt - set aside.

  4. In your stand mixer bowl, beat butter on medium speed until creamy using the paddle attachment. Then add your white and brown sugar, and continue to beat on medium until light and fluffy - about 2-3 minutes.

  5. Scrape down the sides of your bowl and your paddle, then add your egg (or egg replacement), vanilla, and water. Turn mixer on low to combine.

  6. Scrape your bowl down again, then add your dry ingredients - mix on low until combined.

  7. Add your chopped chocolate, and mix on low to incorporate.

  8. Either scoop your dough (using your cookie scoop or 1/3 cup measure) - or, my favorite, weigh out 100g balls of dough. Place four balls on the prepared pan equal distance apart; they will spread, so give them room.

  9. Place the sheet pan in the freezer for 15 minutes. Scoop or weigh out the remaining dough onto a pan to place in the freezer while the others are baking.

  10. Place the baking sheet with the four cookies in the oven and bake for 10 minutes; the center of the cookies will be puffed slightly in the center.

  11. Open the oven, and lift the side of the baking sheet about 4 inches, and gently drop it onto the baking rack. Sarah Kieffer says this will feel so wrong - but trust this genius!

  12. Repeat the pan banging again in 2 minutes, the centers will be slightly puffed again. Repeat a few more times until the cookies have baked for 16-18 minutes. They will be soft, spread out, and golden brown - the centers will be lighter and not fully cooked.

  13. Transfer the baking sheet to a wire rack; let cool completely before removing the cookies from the pan.

  14. *NOTE: with gluten-free flour-based cookies, please transfer the whole piece of foil with the cookies from the pan to the wire rack to not disturb the structural integrity as they cool; they are a little bit more delicate than those made with all-purpose flour.

One little spark.
 

I've always subconsciously been in pursuit of that one thing that 'lights me up.' 

"What am I suppose to do with my life? What is my spark?" The minute I'd find something and think I found it, the sizzle would wear off, and I'd be back to square one. I sometimes feel like 22 from the movie Soul - thinking I’d never find my spark.

When we lived in Chicago and Andrew was in Seminary, I would scroll The Kendall College Culinary Arts curriculum pages. Over and over again, I would read through what each class in the curriculum would teach, what I could learn. I figured I missed my chance to do this new something that might hold my spark. I had just gotten a college degree in Art and Graphic Design, but it was the recession, and I felt stuck in my safe and secure job with benefits. This was not a time to find a new career when you hadn't even gotten a chance to start one you just finished the education for.

Enter internet learning. I've been in coaching groups and online courses, masterminds, and masterclasses—all still searching for perfecting the art of 'doing more of what lights me up.' Through my photography business and blogging endeavors, I've always had fun but was I lit up? I was scared to find out if the answer was no.

A few years ago, I met up for dinner and drinks in Chicago with my friend Cathy. I had taken a few of her courses back in the day and kept in touch via Instagram - I considered her an internet friend, and we even got to meet face to face at a conference. After dinner, we decided to do ice cream, and she said something to me that took me off guard.

"You're someone who just loves to learn."


Wow, I had never thought about myself that way. Was it really that simple - that I loved to learn? I figured I was just a course junkie. Seeing myself in this new light, I realized it was true. I love indulging my curiosity in the pursuit of understanding how something works. I love that the journey sparks the idea of creating something new.

The funny thing is, my dad was the exact same way - a natural-born hands-on learner who always could figure out how something worked. He'd take something apart just to put it back together. He restored a 1959 Ford, built our family home, even piecemealed a Harley Davidson by researching how to do it and ordering each piece on eBay. He had made a career out of being curious - immerse himself into each project sometimes for years - and it was the process of learning and doing that 'lit him up.'

Thursday, I'm debuting a new Everybody Baking Company recipe series called Bakeovers. We'll take a well-known recipe, starting with the internet-famous Pan Banging Chocolate Chip Cookie - and tear it apart to understand how it works. Then we'll put it back together and make sure it's Everybody Approved™. Because the recipe uses traditional ingredients, we'll make it vegan, make it gluten-free, and even see if we can make it both.

Tell me in the comments below - what is that spark that lights you up? Do you know, or are you still waiting to find out?

Five things I don't do in the kitchen
 

Over my decades of baking, I’ve picked up a few tips and tricks here and there to make the process easier. Never did I imagine that I’d stop doing things instead of starting! Here’s a quick list of things I don’t do that help save time when baking!

1. I don't buy premixed gluten-free flour.
I weigh out my gluten-free flour custom for each recipe to have more control over my results.

2. I don't ever assume someone I'm baking for doesn't have a food allergy/intolerance.
It takes no effort to ask if someone has any food preferences or allergies, and if they don't - great! If they do, now I know and can be an even more graceful host when I surprise them with an option they can indulge in, and everyone else can enjoy just as much as an original! Inclusive baking for the win!

3. I don't find recipes on Pinterest.
I will do a quick search to see if I can find what I'm looking for, but if I don't within the first 5 minutes - I crack open a cookbook from a chef or baker I trust. My go-to's are: @inagarten, @gesinebp, @erinmckennasbakery, @cybelepascal, @carlaphall

4. I don't expect one store to have everything I need.
I have a few places in town that I get my ingredients. Check your local health food store, Amazon, grocery store, Aldi, heck, even Walgreens!

5. I don't use measuring cups.
I have abandoned using measuring cups almost all together now that I have switched to weighing my dry ingredients in grams. It creates less dirty dishes (use a spoon or small measuring cup to scoop everything out!) and is extremely accurate (see my first tip, I measure out all my gluten free flours in grams per recipe!)

Have any other ideas of things I should STOP doing in the kitchen? Comment below!

 
LearnComment
Buttered Saltine Crunch Cookie

I sat on the cream linoleum floor, curled up next to the cast iron wood stove to warm my frozen toes fresh from my sopping wet boots. I had just come in from an afternoon in the snow, exploring the woods at my grandma's house in northern Michigan. The afternoon of this memory isn't one snowy day in particular. It's an entire season filled with memories of American Girl books, Anne of Avonlea rentals, and this flavor memory I hold so dearly.

Buttered saltine crackers in my grandma's kitchen.

This spring, I enrolled in Christina Tosi's Monthly course on creative baking. I wanted to flex my culinary education muscles and get inspired by someone I admire while creating a collection of baking courses due out over the next year. The goal of the course is to learn Christina’s recipes and then be inspired to write your own. Honestly, the only recipe I’ve ever taken 100% credit for writing from scratch is the Martian Mallow sundae at Scoops, the ice cream shop I worked at in high school. Other than that, my recipes have been minor riffs on other recipes I've known and loved.

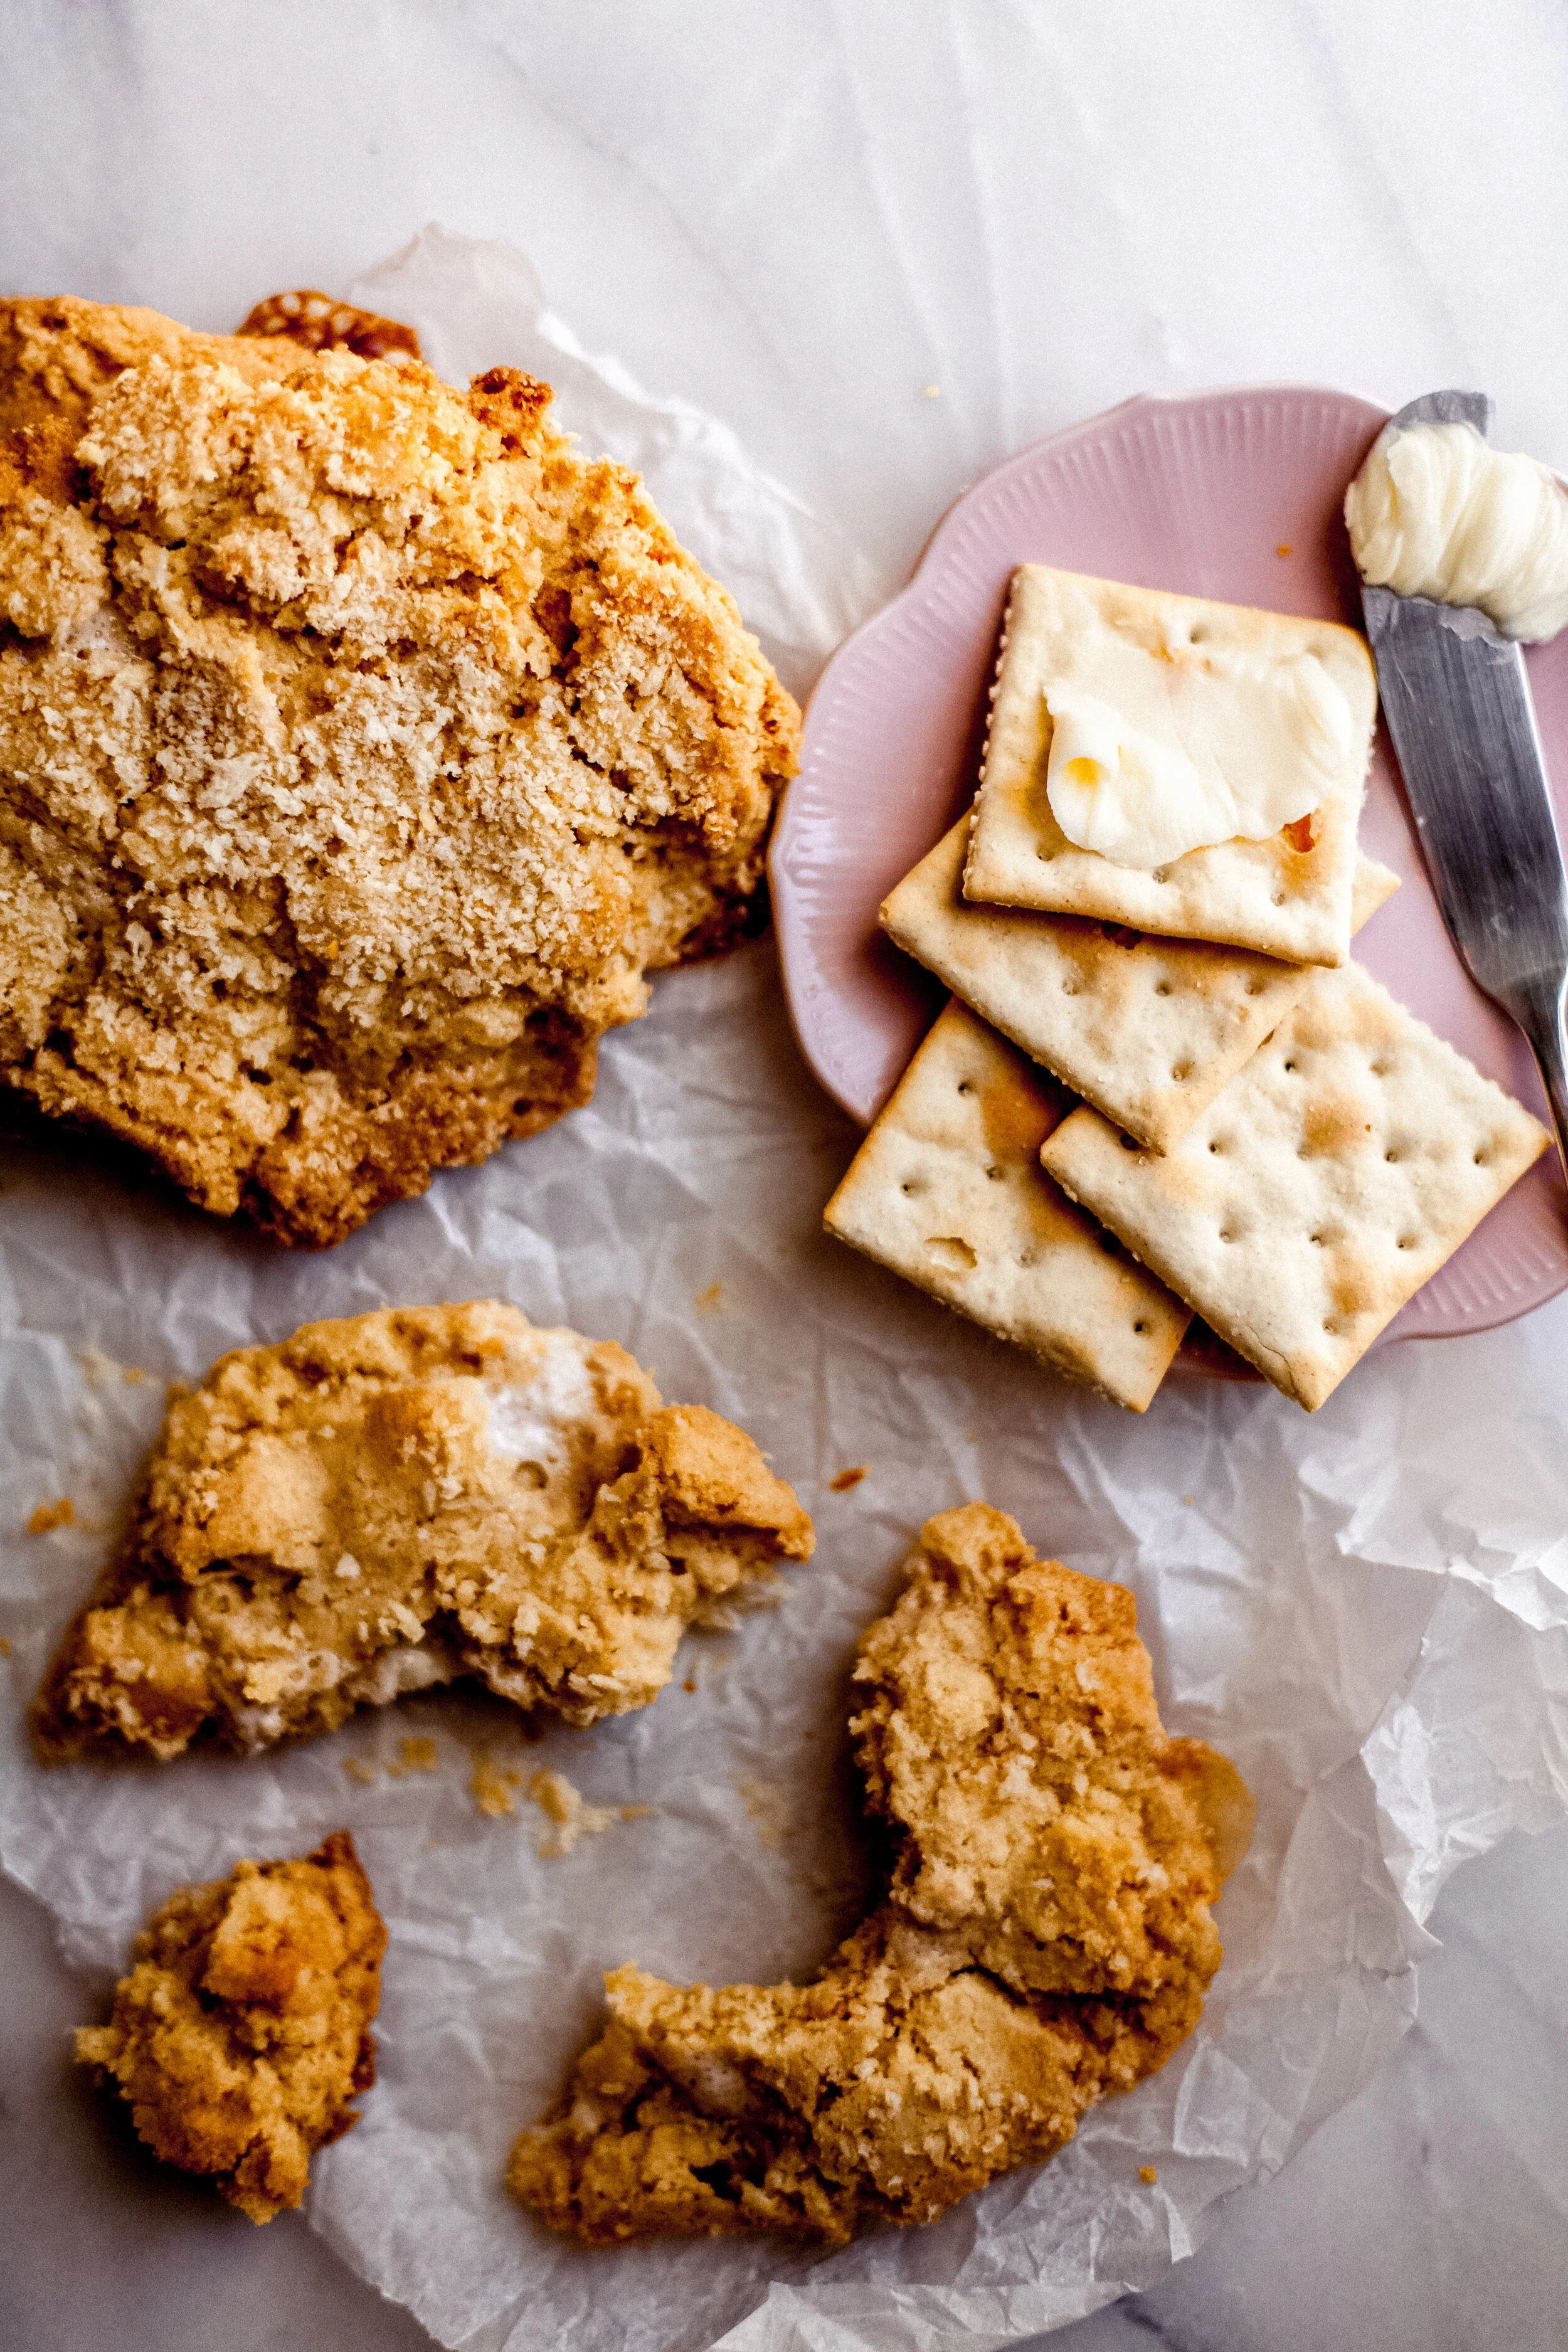
While this recipe starts with a riff on a recipe from the class, it digs deep into my own flavor story centered around this memory. Entire sleeves of Saltines, being devoured along with a sidecar of Fleishman's. My cookie goals were as follows. 

1. To mimic the crunchy familiar feeling of the crackers.

2. To fill the flour with the powdery saltiness that is signature to Saltines.

3. Nail the gooeyness of room temperature butter slathered on those perfect little bites.

This recipe, of course, is Everybody approved with variations from traditional to gluten and dairy free. Choose your ingredient list below and get baking!

Please note, I'm going to be writing recipes using grams instead of cups measurements for dry ingredients from now on. I highly recommend you purchase a kitchen scale. I've had this scale for over a decade, bought on a whim from the clearance section at Sur La Table - it has not disappointed!


Buttered Saltine Crunch Cookie

jump to your ingredients of choice: TRADITIONAL | GLUTEN-FREE | VEGAN | GLUTEN & DAIRY FREE

🥐traditional

Ingredients for the Brown Butter Saltine Crunch

  • 65 g Saltines

  • 15 g non-fat milk powder (1/3 cup + 1 Tbsp) 

  • 2 g kosher salt (3/4 tsp)

  • 50 g browned butter

Ingredients for the Buttered Saltine Crunch Cookie

  • 225 g unsalted butter, at room temperature (2 sticks) 

  • 300 g granulated sugar

  • 100 g light brown sugar

  • 1 egg

  • 130g All-purpose flour

  • 130g ground saltine crackers

  • 3 g baking soda (1/4 tsp)

  • 5 g kosher salt (1 1/2 tsp)

  • 65 g mini marshmallows

  • 60g panko bread crumbs (about a ½ cup)

🌈gluten free

Ingredients for the Brown Butter Saltine Crunch

  • 65 g Schär Gluten-Free Table Crackers

  • 15 g non-fat milk powder (1/3 cup + 1 Tbsp) 

  • 2 g kosher salt (3/4 tsp)

  • 50 g browned butter

Ingredients for the Buttered Saltine Crunch Cookie

  • 225 g unsalted butter, at room temperature (2 sticks) 

  • 300 g granulated sugar

  • 100 g light brown sugar

  • 1 egg

GF Flour Blend:

  • 40g White Rice Flour

  • 24g Cornstarch

  • 22g Brown Rice Flour

  • 20g Tapioca Starch

  • 18g Non-Fat Dry Milk

  • 4g Potato Starch

  • 3g Xanthan Gum

130g ground Schär Gluten-Free Table Crackers

3 g baking soda (1/4 tsp)

5 g kosher salt (1 1/2 tsp)

65 g mini marshmallows

60g gluten-free panko bread crumbs (like Kikkoman brand)

✨vegan

Ingredients for the Brown Butter Saltine Crunch

  • 65 g Saltines

  • 15 g soy milk or coconut milk powder (1/3 cup + 1 Tbsp) 

  • 2 g kosher salt (3/4 tsp)

  • 50 g browned butter (Use Miyoko's European-style vegan butter - it's the only one that will brown due to nut-based proteins)

Ingredients for the Buttered Saltine Crunch Cookie

  • 225 g unsalted vegan butter, at room temperature (2 sticks) 

  • 300 g granulated sugar

  • 100 g light brown sugar

Equivalent of 1 egg

  • Mix 1.5 tablespoons water + 1.5 tablespoons coconut oil + 1 tsp baking powder

130g All-purpose flour

130g ground saltine crackers

3 g baking soda (1/4 tsp)

5 g kosher salt (1 1/2 tsp)

65 g mini marshmallows

60g panko bread crumbs (about a ½ cup)

💯gluten & dairy free

Ingredients for the Brown Butter Saltine Crunch

65 g Schär Gluten-Free Table Crackers

15 g soy milk or coconut milk powder (1/3 cup + 1 Tbsp) 

2 g kosher salt (3/4 tsp)

50 g browned vegan butter (Use Miyoko's European-style vegan butter - it's the only one that will brown due to nut-based proteins)

Ingredients for the Buttered Saltine Crunch Cookie

225 g unsalted vegan butter, at room temperature (2 sticks) 

300 g granulated sugar

100 g light brown sugar

Equivalent of 1 egg

  • Mix 1.5 tablespoons water + 1.5 tablespoons coconut oil + 1 tsp baking powder

GF Flour Blend:

  • 40g White Rice Flour

  • 24g Cornstarch

  • 22g Brown Rice Flour

  • 20g Tapioca Starch

  • 18g Non-Fat Dry Milk

  • 4g Potato Starch

  • 3g Xanthan Gum

130g ground Schär Gluten-Free Table Crackers

3 g baking soda (1/4 tsp)

5 g kosher salt (1 1/2 tsp)

65 g mini marshmallows

60g gluten-free panko bread crumbs (like Kikkoman brand)


Materials

Stand mixer

Kitchen scale

Small and medium bowls and containers

Spatula

2 3/4 oz cookie scoop or 1/3 cup measure

Parchment paper

Sheet pan


Instructions

Make the Brown Butter Saltine Crunch

  1. Preheat your oven to 275° F

  2. To brown your butter, melt in a saucepan over medium-low heat until the butter becomes nutty golden brown. (For a tutorial, Sallys Baking Addiction has a great one). Set aside until you're ready to use.

  3. Place the crackers in a bowl and crush them with your hands until they are in half-inch or smaller pieces.

  4. Add the milk powder and salt and toss to mix.

  5. Pour butter over crackers and toss to coat, then spread the mixture evenly on a sheet pan lined with parchment.

  6. Bake for 20 minutes and cool before incorporating it into your cookie dough. Pieces should be golden brown and have a soft crunch when cooled.

Make your cookie dough.

  1. Preheat the oven to 375° F.

  2. Weigh out your saltine crackers and place them into a food processor fitted with a steel blade. Process until crackers are fine and powdery.

  3. Add the butter and sugar to your mixer bowl. Cream together at medium to high speed for 3 minutes using the paddle attachment.

  4. Scrape down the sides of the bowl and the paddle, add the egg, and beat on high for 7-8 minutes.

  5. Measure your flour, pulverized cracker crumbs, baking soda, and salt together and sift them together with a fork to distribute everything together.

  6. With the mixer on low, add dry ingredients. Mix for about 1 minute and then scrape down the sides of the bowl to make sure every bit of the butter-sugar mix is incorporated with the flour mix until there is no dry flour bits in the bowl.

  7. Add your Brown Butter Cracker Bits and mini marshmallows on low speed for about one minute until evenly distributed.

  8. Using a 2 3⁄4 oz ice cream scoop (or you can measure each cookie on your scale to be 2.75 oz), scoop one portion of your dough, and roll in a bowl of panko bread crumbs. Place on a sheet pan lined with parchment and push down on the top slightly so the cookie dough balls look like small hockey pucks. These cookies do spread when baked, so be sure to leave about 2 inches between each cookie on the sheet.

  9. Refrigerate for 10 minutes, then bake for 12 minutes or until the top starts to be golden brown. Take the cookies out of the oven but do not remove a cookie from the pan for 10-15 minutes. These cookies are super soft, but hard as they cool. If you try to remove them from the pan too soon, they'll fall apart. However, this is key to the ooey-gooey factor, so it's totally worth it.


buttered-saltine-crunch-cookie-3.jpg


Vulnerability and Shrimp Tacos

Today I asked a few questions in my Instagram stories to plan the year ahead and what I hope to Everybody Baking Co to provide. I asked, "do you want me to bring back cooking videos," and the overwhelming response was YES! 🌮

I started making my cooking videos on my stories about 5 years ago now, mostly when I was home alone making dinner or on Saturday mornings making breakfast with Stella. It reflects more of 'me' than anything I probably have shared online at this point. They're spontaneous, unscripted, full of mistakes. On the fly decisions to fix errors or swap ingredients I don't have. As with most things, I got in my head about it way too much, mainly regarding my own self-doubts.

We're on the heels of the Meghan and Harry/Oprah interview this morning. As I sipped my coffee watching the debrief on the morning shows, Oprah shared something that made me go ‘Whaaaat?’.

via GIPHY

</center

It was a conversation she had with Meghan in 2018 where Meghan had been told it would be best if she could be 50% less than she was.

Wow. I've been told that exact thing not once, not twice, but multiple times in my life.

"If you were less (loud/happy/successful/intimidating/the list goes on depending on the scenario and season of my life I was in)...things would be better for you."

So this morning, I'm making a promise to you. To not hide who I am. To be more vulnerable. To inspire you to do the same. 

Whether it be to encourage you to start your own baking adventure.

Or to share more about yourself if you're feeling pressure to edit who you are.

Or just make a little shrimp taco out of leftovers from your fridge and share it on your Instagram.

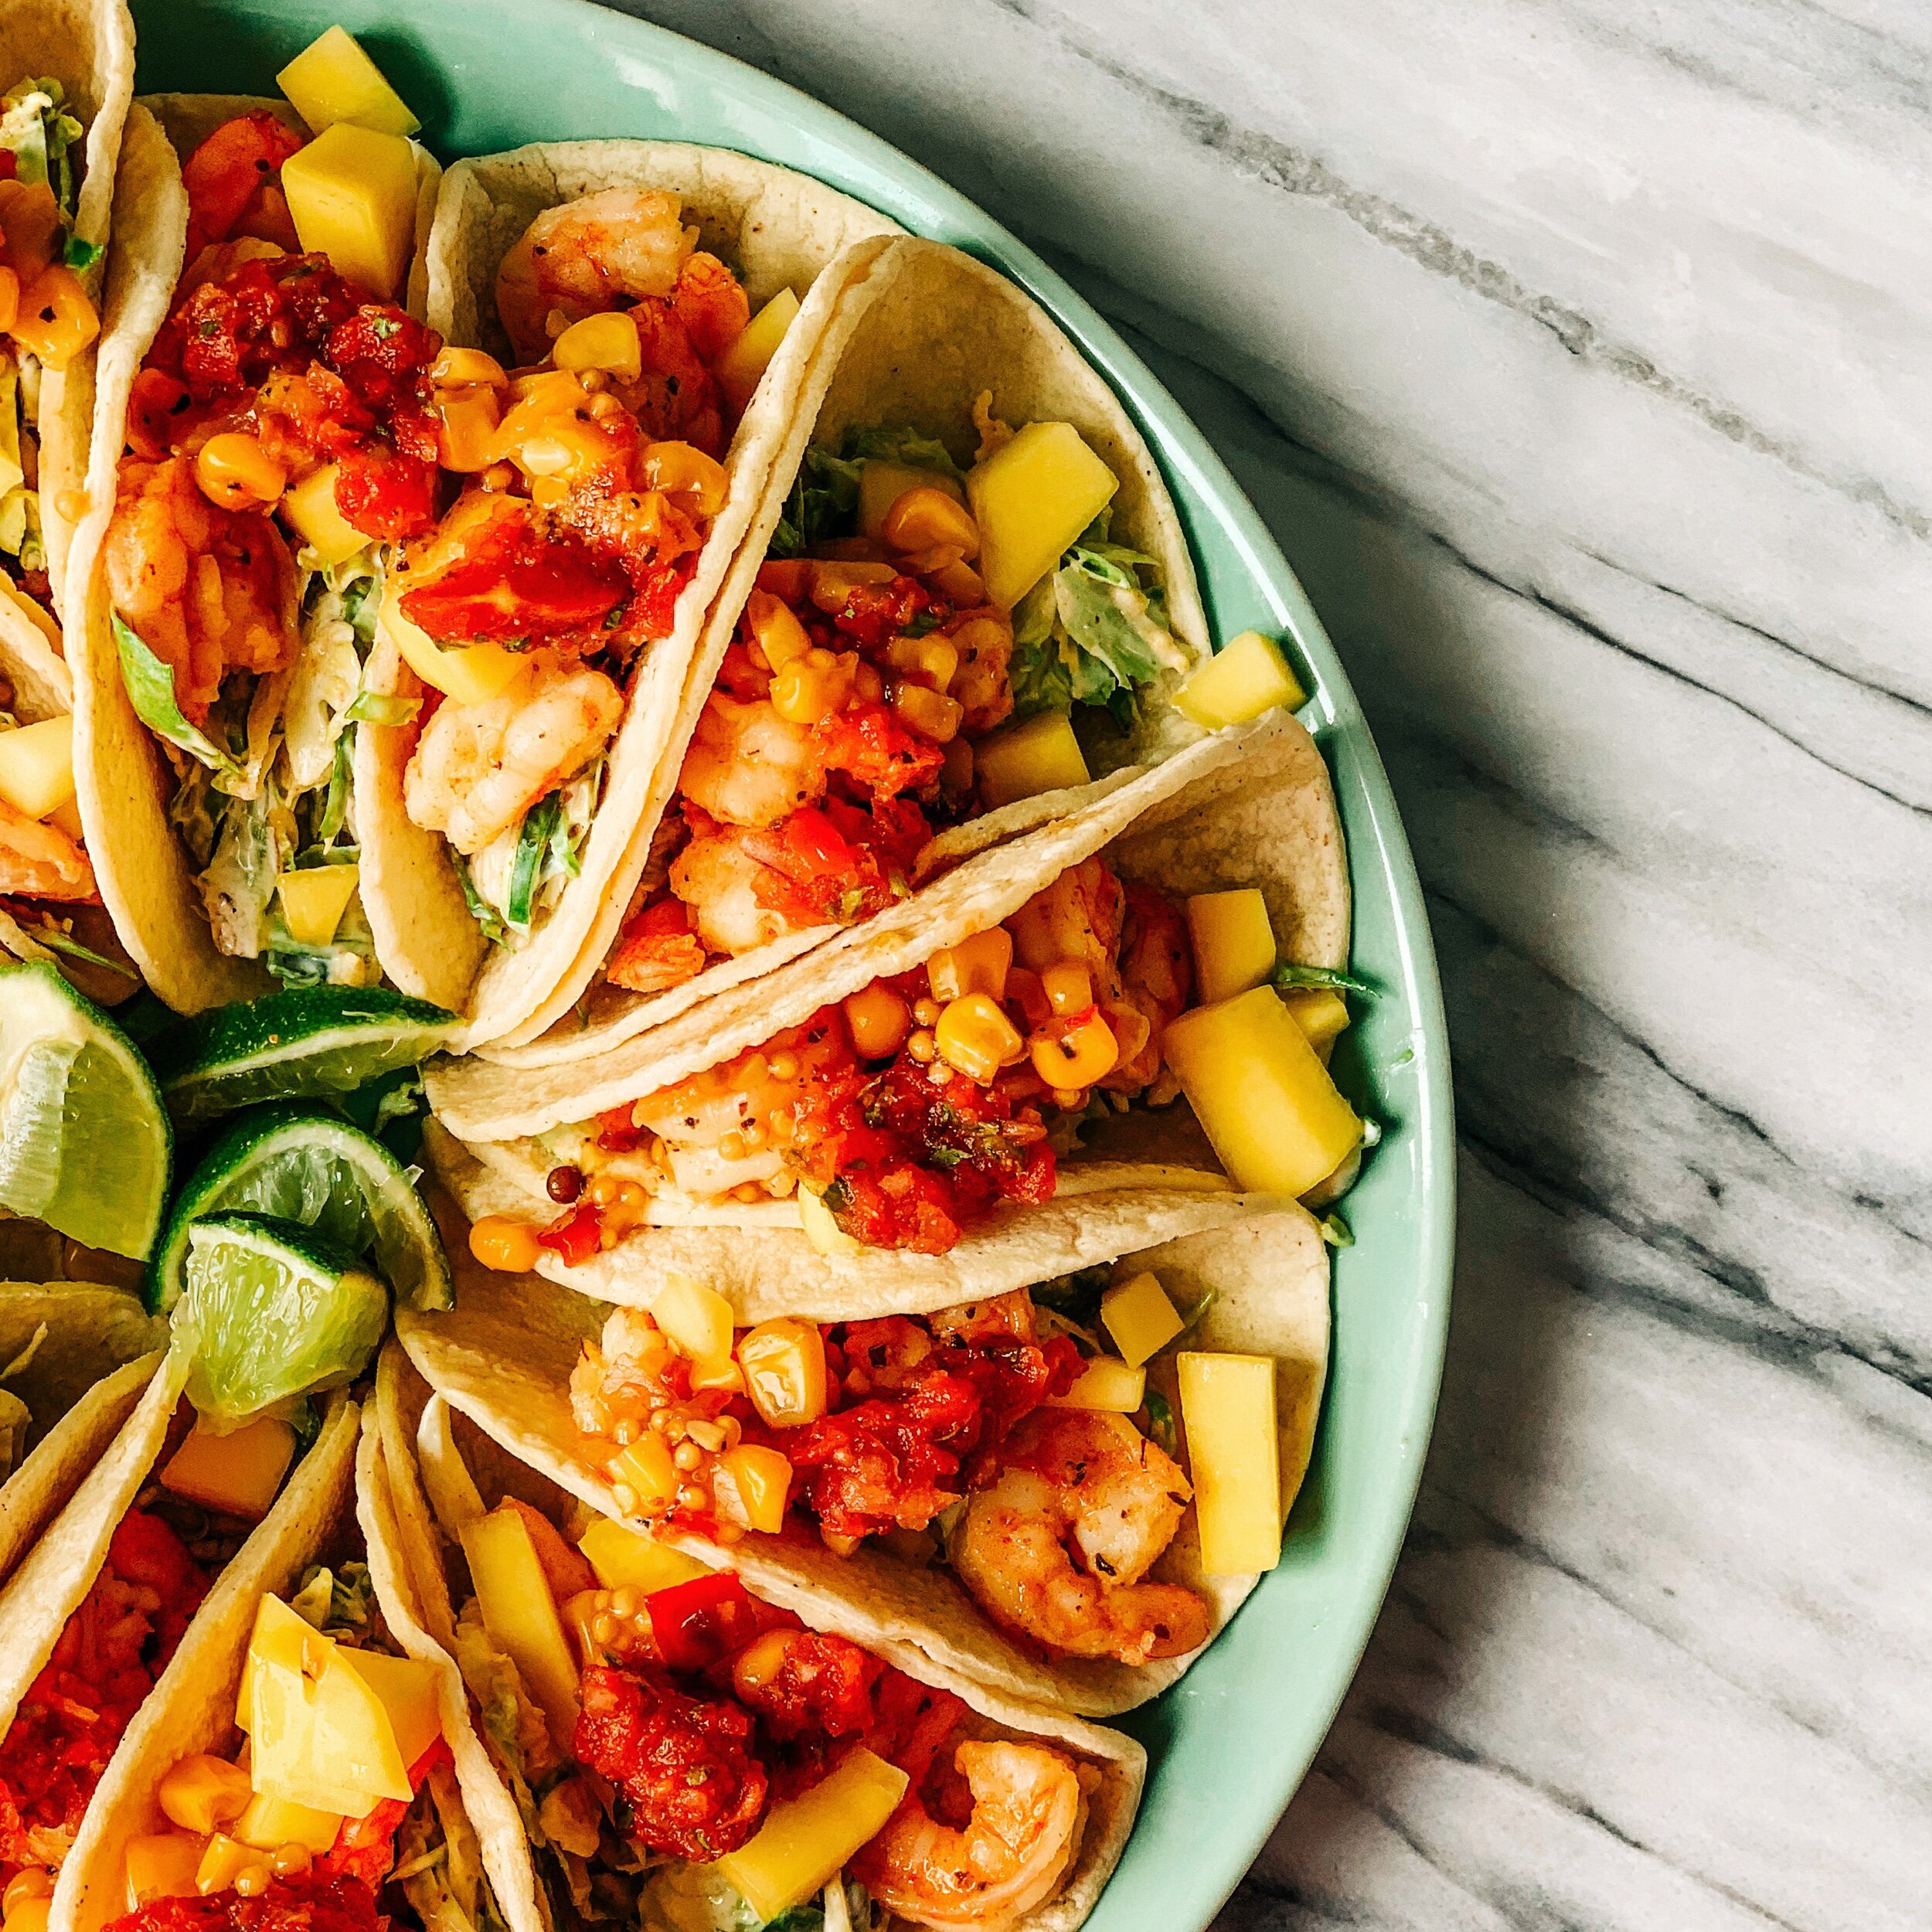
These shrimp tacos are the kind of thing that got me interested in cooking in the first place. I started cooking because I wanted to cook food at home that reminded me of something I'd had at a restaurant. Yesterday, Andrew and I were missing eating at one of our favorite restaurants - Border Grill in Marquette. We were definitely not going to drive an hour to go through the drive-through to get shrimp tacos, so I decided to try and make some for lunch with two goals. Use leftovers and as little effort as possible.

The hardest part about writing this recipe is...it's not a recipe. It's literally leftovers in my fridge, mixed in with one or two things I made on the fly. Hopefully, you can take my bits and bobs and create something of your very own.

54E689D4-E491-4C8F-B93C-F992E3F7A112.jpeg54E689D4-E491-4C8F-B93C-F992E3F7A112.jpeg

Border Grill Shrimp tacos have a cabbage slaw, a white sauce, shrimp, and you can put salsa of your choice on top. What I had in my fridge was:

1️⃣ White corn street tacos size tortillas

2️⃣ A dozen shredded Brussels Sprouts from a salad (shredded with my food processor)

3️⃣ Diced mango (could use canned pineapple!)

4️⃣ Shrimp (I always buy the raw - aka, gray ones - frozen, deveined, with no tails)

5️⃣ Not even a full tablespoon of Trader Joe's corn salsa (again, this was clean out the fridge time) and homemade salsa I also had in the fridge for chips.

All I had to do was make shrimp and crema, so here is my low effort versions:

  • I did not measure anything to make the crema - I simply emptied out the last of the mayo and sour cream I had. I would imagine something like this: about 1/4 cup mayo, 1/4 cup sour cream, lime juice, hot sauce, cilantro, and spiced to taste with salt, garlic powder, and cumin. Then toss that with the shredded Brussels sprouts (or you could use bagged coleslaw mix).

  • I boiled the shrimp to thaw and cook them in one step, plus reduce the amount of effort it would take to clean that pan vs. sauteeing thawed shrimp. I melted some butter and added spices I already had out from the slaw (cumin, garlic, salt, and then a little oregano).


Instead of a DIY assembly, I put each taco together on a giant dinner plate. That way, we got to focus on chowing down instead of stopping, assembling, eating, and then doing it all over again.

If you make something similar, would you share it in your Instagram stories and tag me at @everybodybakingco? I'd LOVE to see the ripple effect a simple 'non-recipe' post could have in inspiring you to cook 'on the fly.'

Not DessertComment